
Exploring caves is one of the most rewarding outdoor adventures—but without proper cave route planning, it can quickly become dangerous. If you’re searching for clear, practical guidance on how to prepare for a cave expedition, understand underground navigation, and avoid common trekking mistakes, you’re in the right place.
This article is designed to help you move from uncertainty to confidence. We break down essential cave trekking basics, including terrain analysis, navigation techniques, survival priorities, and the gear that truly matters once you’re below the surface. Whether you’re planning your first descent or refining your approach for more complex systems, you’ll find actionable insights grounded in real-world outdoor experience and proven safety principles.
Our goal is simple: give you reliable, field-tested knowledge you can trust. By the end, you’ll understand how to assess risks, map smarter routes, and prepare effectively for a safer, more successful underground journey.
Before the Descent: Your Blueprint for Cave Exploration
Stepping into a cave without a plan is how horror movies start—think The Descent, but without the soundtrack to warn you. First, define your objective: are you mapping passages, training, or photographing formations? That clarity shapes every decision.
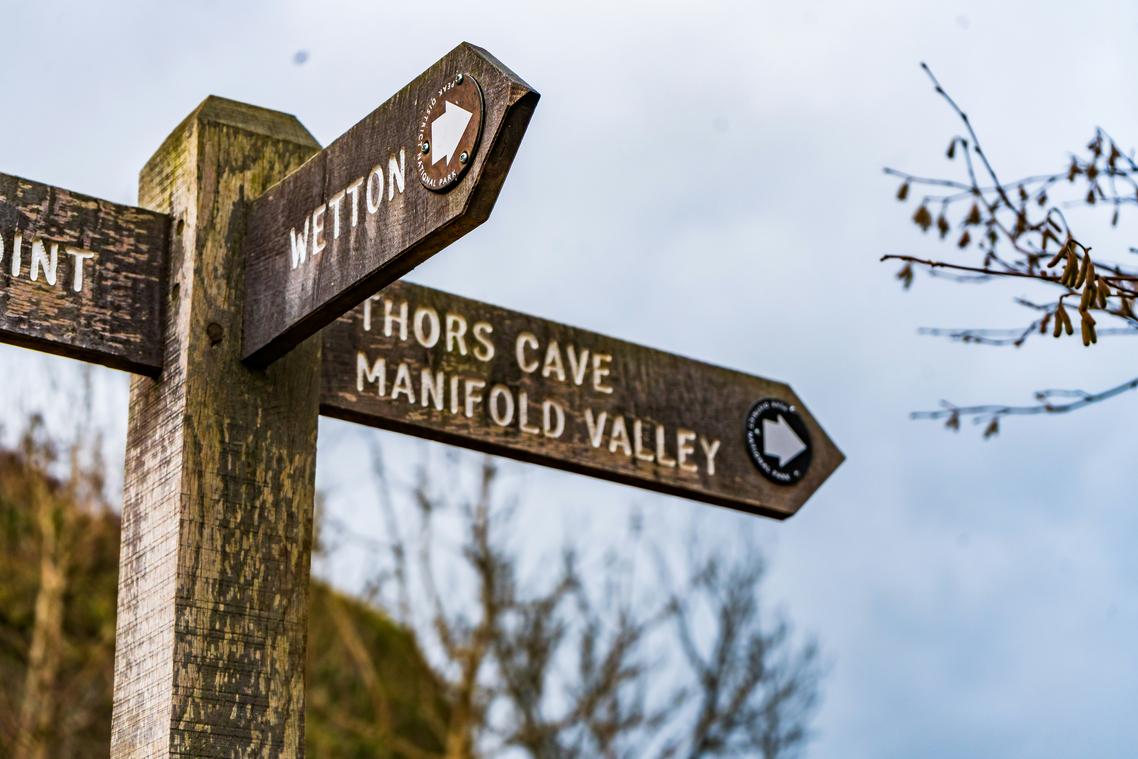
Next, research the system’s topology. Study maps, note vertical drops, water flow, and choke points. This is cave route planning in action—a deliberate process of charting entry, primary path, and exit before boots touch rock.
Then, build contingencies. Mark turnaround times, stash backup lights, and share your itinerary topside. Caves are three-dimensional mazes; GPS won’t save you underground.
Finally, rehearse navigation signals and emergency drills. In other words, plan like it’s Apollo 13: hope for routine, prepare for chaos.
Phase 1: Armchair Caving and Digital Reconnaissance
Before you ever lace up your boots, start with research. First, gather intelligence from caving clubs, geological survey maps, and region-specific forums. These sources often reveal recent rockfalls, seasonal flooding patterns, or access changes (details that rarely make it onto glossy maps). Next, compare multiple trip reports to spot consistencies—if three cavers mention a tight squeeze 200 meters in, assume it’s real.
Then, focus on the cave’s “personality.” Is it primarily horizontal, or does it require Single Rope Technique (SRT)—a method for ascending and descending vertical shafts using specialized gear? A horizontal system may demand endurance, while a vertical one demands rope skills and anchors. Think of it like prepping for a hike versus prepping for a climbing gym session.
Using tools like TopoDroid or GIS platforms, study surveys carefully. Mark entrances, junctions, water flow, and hazard zones. This is where cave route planning becomes strategic rather than guesswork.
Finally, analyze surface terrain. Sinkholes, ridgelines, and drainage basins often mirror passages below. Water always leaves clues. Pro tip: after heavy rain, reassess maps—hydrology can completely change your risk profile.
In short, smart preparation above ground prevents costly mistakes underground.
Phase 2: Translating Data into a Navigable Plan
Data means nothing until it becomes a route you can follow underground. So first, create your primary route. Sketch it clearly on waterproof paper and mark major junctions—Junction A, Junction B—and every decision point in between. Keep it simple. Complexity looks impressive on paper but fails in tight passageways (and caves rarely reward overconfidence).
Build Redundancy Into the Plan
Next, apply the Rule of Threes:
- One map for the team leader.
- One for the rear member.
- One left with a trusted surface contact.
Redundancy isn’t paranoia; it’s probability management. If one copy is lost or soaked, the mission continues.
Then calculate travel times between each point. Be realistic about terrain, vertical drops, and fatigue. Establish a hard turnaround time—the non‑negotiable moment you head back, no matter how close the objective seems. Many rescue reports cite missed turnaround times as a primary factor in incidents (National Speleological Society accident summaries). Discipline saves energy—and lives.
Marking your path comes next. Use non-permanent indicators like survey flags or reflective tabs. Remove them on exit. Paint or carvings damage fragile cave ecosystems and may even violate conservation laws.
Finally, assemble essential navigation gear: multiple headlamps with spare batteries, a reliable compass (practice using it in 3D space), and a backup GPS for the entrance.
Looking ahead, it’s reasonable to speculate that digital cave route planning tools will become more common, possibly integrating AR overlays. Still, paper backups will likely remain standard—because batteries fail, but graphite doesn’t.
Phase 3: Executing the Plan at the Cave Entrance
I still remember the first time I skipped a proper entrance briefing. We were eager, the weather was turning, and everyone swore they “knew the plan.” Forty minutes later, we were debating a fork in the passage with fading patience (and fading light). Since then, I treat the entrance like a launchpad.
The Pre-Entry Briefing
Gather your team just outside the mouth of the cave. Review the intended path, turnaround time, and emergency signals. Define turnaround time clearly: it’s the predetermined moment you head back regardless of progress. It prevents “just five more minutes” syndrome. Confirm roles and expectations so everyone understands the cave route planning decisions already made.
Sync Watches and Check Gear
Synchronize watches down to the minute. Perform a hands-on inspection of lights, spare batteries, helmets, and compasses. Redundancy—carrying backups for critical gear—isn’t paranoia; it’s survival (ask anyone who’s hiked out by headlamp glow alone).
Orienting the Map
At the entrance, physically align your map with the terrain. Take a compass bearing and identify the first landmarks. If you need a refresher, review using topographic maps for subterranean navigation before stepping inside. Pro tip: say the first three route features out loud—it locks them into memory.
Phase 4 demands movement with intention. First, practice leapfrogging and surveying: travel from one confirmed point to the next, measuring distance and direction to compare against your map. Surveying—systematically recording bearings and lengths—turns guesswork into data. While many trekkers assume instinct is enough, relying on “gut feeling” underground is how people get lost (and humbled).
Next, manage every junction deliberately. Pause. Breathe. Consult the map. Confirm your position before choosing a path. Mark the passage you came from so your return isn’t a coin toss. This is where cave route planning becomes practical, not theoretical.
Meanwhile, read the cave itself. Airflow signals another entrance or a larger chamber; water flow usually trends toward lower exits; passage morphology—the shape and texture of walls—reveals how the system formed and where it may open up.
Contrary to popular belief, speed isn’t safety. Precision is. Move slower than feels necessary, and you’ll move smarter.
Emerge with Confidence
You have the maps, the notes, the backup lights—so why does it still feel overwhelming? It’s because uncertainty underground is brutal. Getting lost in the dark isn’t dramatic; it’s terrifying. That’s why cave route planning matters.
Instead of guessing, you:
- Define clear entry and exit points.
- Mark decision nodes and hazards.
- Set turnaround times before fatigue clouds judgment.
Some argue spontaneity makes adventure pure (like an action hero ditching the map). But real explorers know discipline beats panic.
Pro tip: rehearse your plan aloud. Start with a beginner cave and practice methodically. Confidence follows preparation. Every time.
By understanding how to read cave formations, you can greatly enhance your route planning, which complements the insights from our article on the advantages of digital mapping versus traditional surveying in caves – for more details, check out our Digital Mapping vs Traditional Surveying in Caves.
Ready for Your Next Descent
You came here looking for clarity on how to approach your next cave adventure with confidence—and now you have it. From understanding terrain and navigation basics to sharpening survival awareness and gear selection, you’re better equipped to make smart, informed decisions underground.
Caving isn’t just about curiosity—it’s about preparation. The biggest risk explorers face isn’t the darkness itself, but poor cave route planning, lack of navigation strategy, and underestimating unpredictable terrain. One wrong turn or overlooked detail can turn an exciting trek into a dangerous situation.
Now it’s time to put this knowledge into action. Review your gear checklist. Study your maps. Analyze the terrain before you step inside. Approach every expedition with a plan, not guesswork.
If you want reliable guidance trusted by explorers who take safety seriously, dive deeper into our expert cave trekking insights and field-tested survival strategies. Get the tools, tips, and route breakdowns you need to explore smarter and safer.
Don’t leave your next expedition to chance—prepare thoroughly, plan wisely, and make every descent a confident one.
 Janice Martinezelous has opinions about cave navigation and terrain analysis. Informed ones, backed by real experience — but opinions nonetheless, and they doesn't try to disguise them as neutral observation. They thinks a lot of what gets written about Cave Navigation and Terrain Analysis, Cave Trekking Basics and Survival Skills, Horizon Headlines is either too cautious to be useful or too confident to be credible, and they's work tends to sit deliberately in the space between those two failure modes.
Reading Janice's pieces, you get the sense of someone who has thought about this stuff seriously and arrived at actual conclusions — not just collected a range of perspectives and declined to pick one. That can be uncomfortable when they lands on something you disagree with. It's also why the writing is worth engaging with. Janice isn't interested in telling people what they want to hear. They is interested in telling them what they actually thinks, with enough reasoning behind it that you can push back if you want to. That kind of intellectual honesty is rarer than it should be.
What Janice is best at is the moment when a familiar topic reveals something unexpected — when the conventional wisdom turns out to be slightly off, or when a small shift in framing changes everything. They finds those moments consistently, which is why they's work tends to generate real discussion rather than just passive agreement.
Janice Martinezelous has opinions about cave navigation and terrain analysis. Informed ones, backed by real experience — but opinions nonetheless, and they doesn't try to disguise them as neutral observation. They thinks a lot of what gets written about Cave Navigation and Terrain Analysis, Cave Trekking Basics and Survival Skills, Horizon Headlines is either too cautious to be useful or too confident to be credible, and they's work tends to sit deliberately in the space between those two failure modes.
Reading Janice's pieces, you get the sense of someone who has thought about this stuff seriously and arrived at actual conclusions — not just collected a range of perspectives and declined to pick one. That can be uncomfortable when they lands on something you disagree with. It's also why the writing is worth engaging with. Janice isn't interested in telling people what they want to hear. They is interested in telling them what they actually thinks, with enough reasoning behind it that you can push back if you want to. That kind of intellectual honesty is rarer than it should be.
What Janice is best at is the moment when a familiar topic reveals something unexpected — when the conventional wisdom turns out to be slightly off, or when a small shift in framing changes everything. They finds those moments consistently, which is why they's work tends to generate real discussion rather than just passive agreement.